When you grow quinoa at home, the next step before you can enjoy all your hard work and effort is harvesting. However when you are new to harvesting, it is always a good idea to do some research, if you can relate then you are in the right place. In this guide, we’ll be sharing with you the exact steps you need to know on how to harvest quinoa.
Quinoa is a complete source of protein and has an impressive list of properties beneficial for our health. Better yet, it is very easy to use, the grains are slightly larger than couscous and are cooked in a similar way to rice, with little spirals of white germ appearing as they expand.
As you can tell by now, from that first seed to the time you consume your quinoa, there’s a whole process that needs care and attention. As challenging as it may sound, harvesting quinoa can be done by anybody, all you have to do is follow a few key steps and make sure you have the right tools for the job. Continue reading as we tell you all about how to harvest quinoa at home, the right way.
How To Harvest Quinoa FAQ’s
What is quinoa?
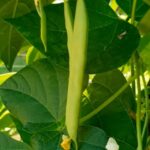
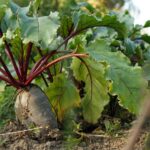
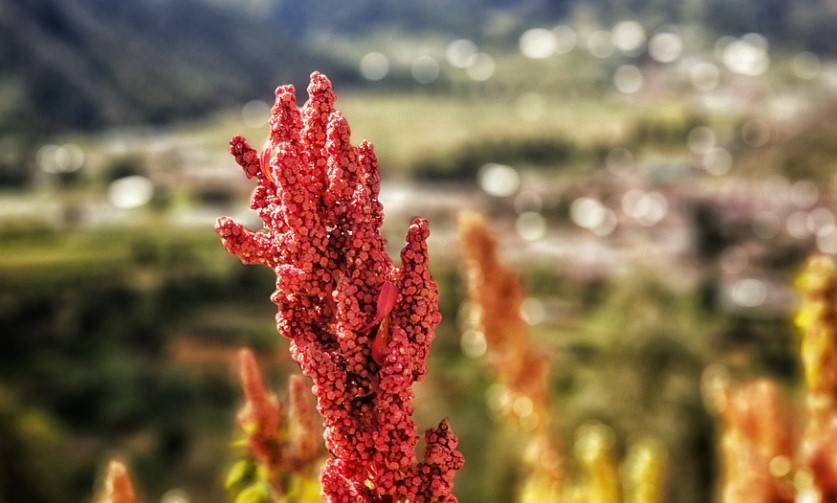
Although quinoa (Chenopodium quinoa) looks like a grain, it’s actually a tiny seed called a pseudocereal. As a member of the goosefoot family, quinoa is closely related to spinach, beets, and lambs quarter. The plants grow about 6 feet (2 m.) tall and make an attractive addition to the landscape. The seedheads come in a rainbow of colors, including white and shades of red, pink, purple, yellow, and black.
Can I grow quinoa in my garden?
Absolutely. You can grow quinoa if you live in an area with the right climate and you are willing to devote a large plot to growing the crop. The climate is the main obstacle for most people. Quinoa needs short days with cool night temperatures and daytime temperatures below 95 degrees F. (35 C.).
Why grow quinoa?
Quinoa plant benefits include high nutritional value and low sodium. It has less sodium and more essential nutrients than wheat, barley, or corn. Although more grocery stores are carrying quinoa each year, it is very expensive compared to grains.
Tip to grow quinoa:
- Till the soil thoroughly, working in a complete fertilizer or a layer of compost.
- Form rows about 3 feet (1 m.) wide and 18 inches (46 cm.) apart.
- Plant the seeds 1/2 to 1 inch (1-2.5 cm.) deep. An easy way to do this is to make two or three shallow trenches down each row with the corner of a hoe or cultivating tool.
- Place the seeds in the trench and then fill in the trench with soil.
- Water lightly. The seeds rot if they are kept too wet.
How to care for the quinoa plant?
Quinoa plant care is easy in the right setting. It tolerates drought but grows best when you never allow the soil to dry out. Water lightly and frequently instead of deeply. Fertilize at planting time and side dress four to six weeks later with the same nitrogen fertilizer that you use in your vegetable garden.
How do you get quinoa off the plant?
If such weather is looming, simply cut the seed stalks about 15cm (6″) below the start of the seed head, and bundle them in groups of eight to twelve. Hang these indoors in a well-ventilated room, away from bright sunlight. As the stalks dry, the seeds will become looser, and begin to fall from the seed heads.
What does quinoa look like before it’s harvested?
Quinoa seed ready for harvest is hard and difficult to dent with a thumbnail. Look at the quinoa plant for visual cues. Leaves drop off the plant and turn from green to red or yellow when the quinoa seeds are ready for harvesting. Usually, the seeds aren’t ready until just after the first frost.
Can you eat quinoa leaves?
quinoa, (Chenopodium quinoa), plant species grown for its tiny edible seeds. As a member of the Amaranthaceae family, quinoa is not a true cereal. Its seeds are high in protein and fiber, and its young leaves are also nutritious and can be eaten as a vegetable similar to spinach (to which it is related).
How to know if quinoa is ready to be harvested?
Press a quinoa seed with your thumbnail to determine whether or not the quinoa crop is ready for harvesting. Quinoa seed ready for harvest is hard and difficult to dent with a thumbnail. Look at the quinoa plant for visual cues. Leaves drop off the plant and turn from green to red or yellow when the quinoa seeds are ready for harvesting. Usually, the seeds aren’t ready until just after the first frost.
What time of the year is quinoa harvested?
The leaves will turn yellow and red and start to fall off. The seeds themselves will become so hard that squeezing them between your fingernails won’t leave a dent. When you reach that state, your quinoa is ready to be picked. This is typically right after the first frost of the season.
Can you sprout store-bought quinoa?
Completely cover quinoa in filtered water and soak for 1 hour. Rinse and drain water and transfer quinoa to a sprouting jar or a fine colander. Sprouting will occur in 24 hours, but you can continue to sprout for 2 days if desired for a softer consistency. You can store quinoa in an air-tight container for up to 1 week.
What to do with quinoa after harvesting?
Quinoa seeds are coated with a bitter substance called saponin. They require rinsing prior to cooking to remove the saponin. Rinse quinoa as you would rice, in several bowls of cold water. This will free any remaining particles of chaff as well.
What common pests affect quinoa?
Flea beetles may leave tiny holes in leaves, but the plants usually outgrow the damage. Several types of caterpillars may feed on quinoa, but they are easily controlled with an organic pesticide that uses Bacillus thuringiensis as its active ingredient.
How To Harvest Quinoa
Method 1: Early Harvest
- There will be seasons when cold, wet weather, threatens the harvest. If such weather is looming, simply cut the seed stalks about 15cm (6″) below the start of the seed head. Use pruning shears for the task. Repeat the procedure with other seed heads.
- Bundle them in groups of eight to twelve. Hang these indoors in a well-ventilated room, away from bright sunlight.
- As the stalks dry, the seeds will become looser, and begin to fall from the seed heads.
- It’s useful to lay a bed sheet or tarp below the hanging stalks in order to catch any that fall.
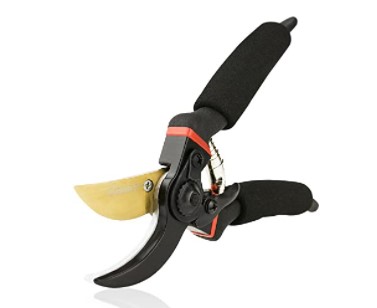
Titanium Bypass Pruning Shears
Gonicc always thinks premium durable and comfortable pruners are a must-have for any gardener. All of the Gonicc pruning shears adopted high-quality materials and strict quality control.
The blades made with Ultra-fine Polishing Technology and Teflon or titanium coating, are very sharp and prevent tree pulp adhesion caused by rust on the blades.
Handle material is high-quality Aluminum and wrapped with a layer of PVC, very soft and comfortable to use.
Features:
- Ergonomic
- Titanium Steel
- Durable
Method 2: Bashing
- Bash the heads about inside paper yard waste bags. These are the right size to catch all the seeds and chaff as it is separated and freed from the seed heads.
- If you squeeze and twist the seed heads, you will hear the hard, dense seeds falling into the bag.
- Process all the dry seed heads this way, and then collect the contents of the bag in a large bowl.
Separating seeds from the chaff:
- It can be done outdoors on a windy day simply by pouring the contents of the bowl into another. The chaff is much lighter and less dense than the seeds, and some of it will blow away each time one bowl is poured into another.
- This can also be done indoors using a bedsheet and a table fan. Layout the bed sheet to catch the chaff, and pour the seeds from one bowl to another in front of the fan. After five or six “pours,” the seeds will be quite free from chaff, but the process can be repeated until you are satisfied.
- Take the tray or box of quinoa seeds outdoors. Blow the chaff and other debris away from the seeds by using a hairdryer on its cool setting. The chaff is light enough that the air from the hairdryer should force it away easily.
- Pour the quinoa seeds into a fine-mesh strainer. Place the strainer under cold, running water, and rinse away. Keep rinsing the quinoa until bubbles stop forming and the water that runs out of the strainer is clear. Spread the seeds on a flat surface to dry before storing them.
How To Harvest Quinoa Additional Tips
- Wait until the plants shed their leaves to harvest your quinoa. When the weather is dry, bend over seed heads into a large bucket and clip them off. Working in a dry place, strip off the seeds, use a fan to winnow out debris, and spread the seeds on screens or trays to finish drying indoors.
- Quinoa plants are ready for harvest 90-120 days after planting. Once the leaves have fallen off and only the dried seed heads remain, the seeds are ready to be harvested.
- Fortunately, quinoa is simple to harvest; the seeds can be stripped upwards towards the stalk which easily dislodges them.
- Once harvested, sift the fresh quinoa seeds using a grain sifter. Before storing, the quinoa seeds need to be thoroughly dried out.
- Spread the seeds out thinly on a tray and place them in the hot sun or near a heat source to dry. Dried quinoa can be stored in an airtight container in a cool, dry location for up to six months. Interested in knowing how to harvest green beans?